Using Checklists in Brightspace
Checklists are primarily used as a tool for students to help them to track their own progress within a module. Checklists are used to support learners in completing learning activities, assessments and also for assignment preparation or simply to help students to remain on top of their learning.
When to use a Checklist
Key Uses: To-do lists, formative assessment, component lists, progress tracking, self-assessment, activity list, etc
A checklist can be created by a lecturer to highlight important or required learning materials/activities or assignments that need to be completed within specific timeframes. Using checklists throughout your module or at certain relevant points can be an effective way of keeping students engaged while helping them to stay organised. When the student has completed the task, they can check the box in the checklist.
How to use a Checklist
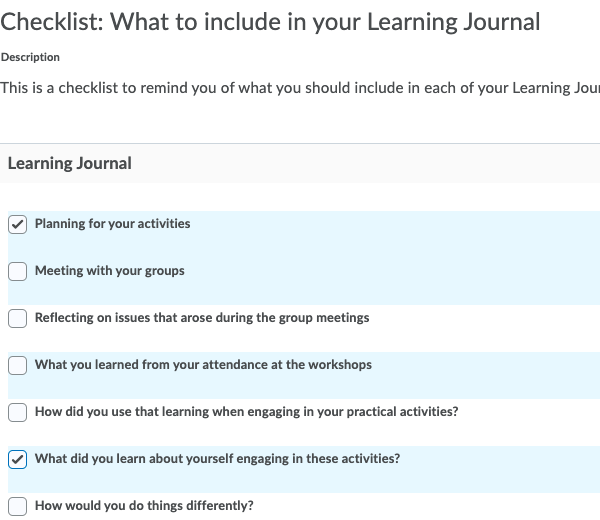
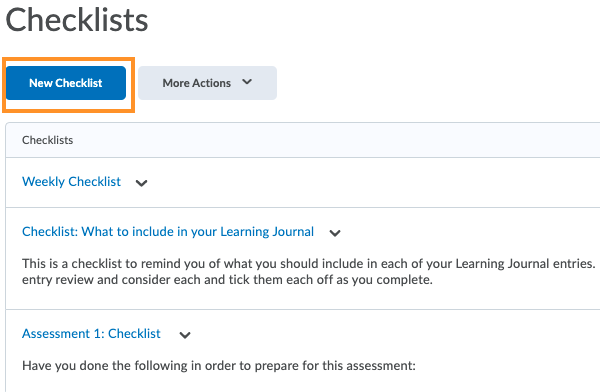
A lecturer can decide to create a checklist for each week or topic of a module, or use checklists to break down the key activities that students will be expected to complete as part of their course work. For example, for either an assessment or simply aiding in the preparation of an assignment or activity. It could be used as a component list for a learning activity as shown in the checklist example below; ‘What to Include in your Learning Journal'.
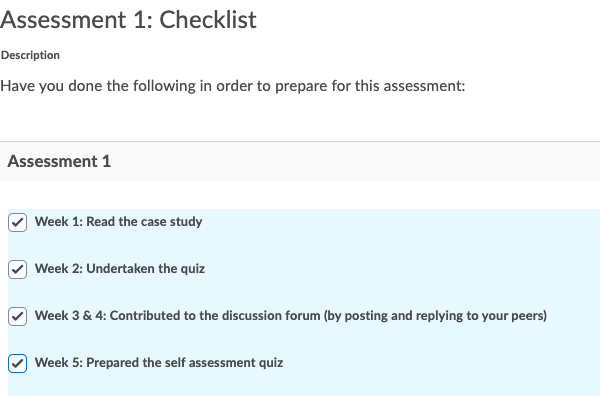
A checklist could also be used as an assessment check as shown in the example opposite; ‘Assessment 1 Checklist: Check have you completed the following’.
In this way, it is ideally used as a formative task, that may help with preparation and even self-assessment, highlighting what has to be done, when and even to what level. In essence it may also provide the learner with a quick overview of outstanding tasks/work/assignments that is or remains to be completed.
How to create a Checklist
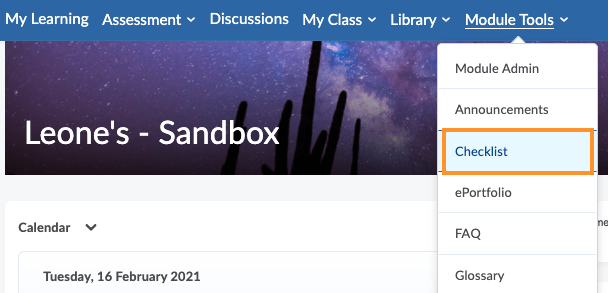
1. From the Module tools menu bar in your module, choose Checklist from the dropdown to access the Checklist tool.
2. Select the new checklist as shown;
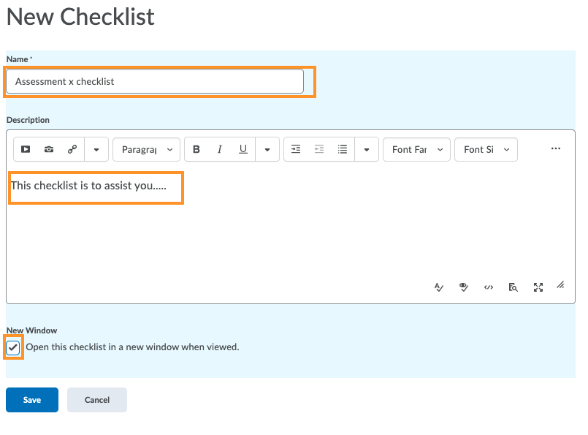
3. Enter checklist details; name your checklist and add a description (as needed).
4. You have the option to check the box to have the checklist pop up in a new window when viewed by the student, then click save.
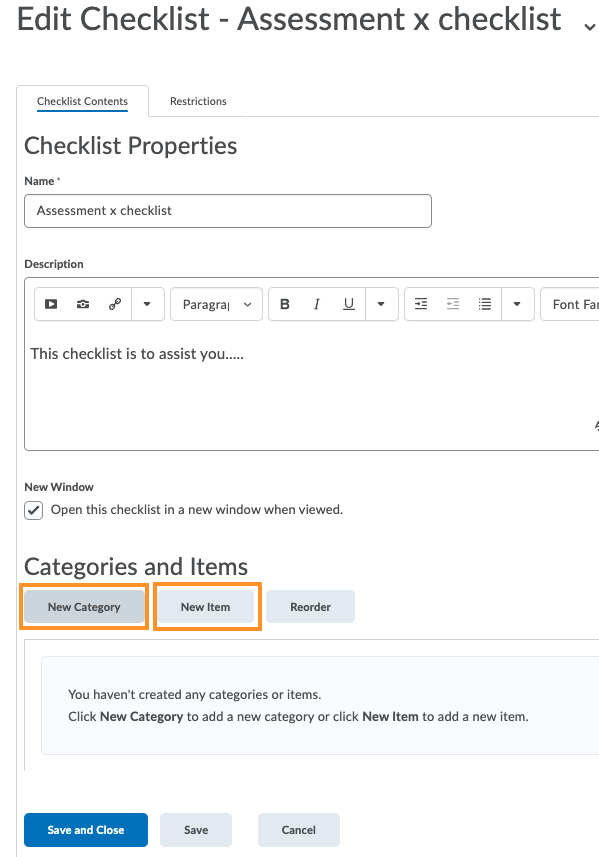
5. On the Edit Checklist page (as shown in the opposite image), you will need to do the following;
- Add a category to the checklist, click New Category and enter your category name and description (if required) and save (Brightspace requires you to create a new category before you can add items).
- Add an item to the checklist (as shown in the image opposite), by clicking New Item.
- From the Category drop-down list, select the category for your item. Enter your item details. If you want the item to be due by a certain date or time, select the check box and enter your Due Date information. You can also check the box to have the item visible in the module calendar for students.
- Click Save.
6. Repeat step 5 until you have added all items to your checklist and close.

Practical Tip
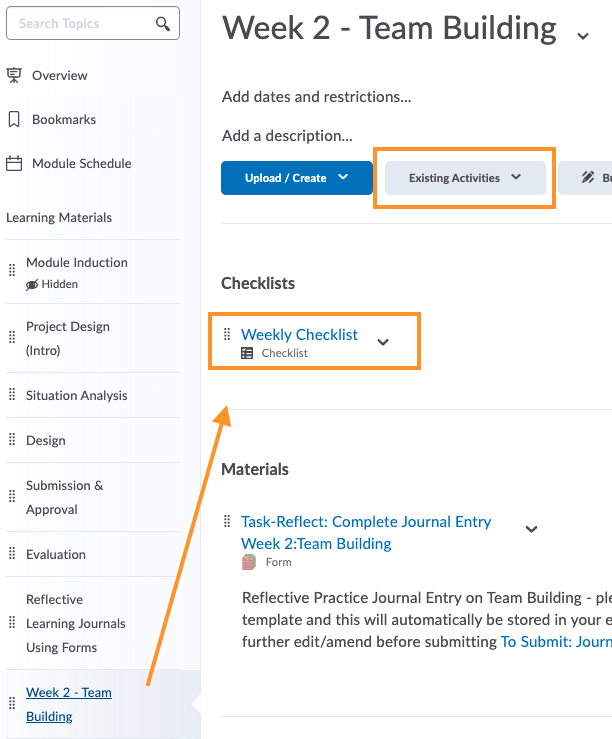
You should insert checklists into the relevant unit in the Learning Materials section of your module via Existing Activities. To do this choose the checklist you wish to add to the unit, and it will be added to the bottom of the list of items (as per the example shown below, where a weekly checklist has been added to the ‘Team Building’ Unit).