What is the tool used for?
“What is a process?” A process is a series of actions taken to achieve a desired result. A process has inputs (things it needs to function) and outputs (things it produces or changes), as does each process step.
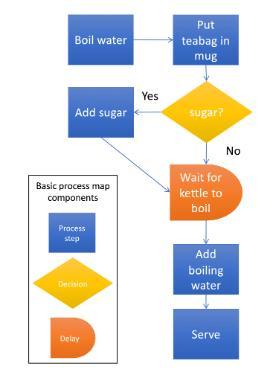 Process mapping is an exercise where you graphically display the steps/activities that make up a process. So, a process map is a step-by-step illustration of how a process works and how inputs/outputs flow between each step. A simple process map contains process steps and decision. Delays are an additional component frequently illustrated in process maps, highlighting the points in the process where there are periods of waitin
Generally, we start with a high-level AS-IS process map so that we understand the scope and functions of the existing process, as well as who is involved in it. Then, we drill-down into particular problem area(s) and develop an AS-IS map out that/those part(s) in detail, including every process step.
It is important to start by mapping the AS-IS process to make sure we understand it completely. This way, when we come to investigating root causes of problems and designing an improved process map, we can create a TO-BE process map that be much more effective and efficient.
Why should someone use it?
- As a visual tool, a process map is more engaging than words or numbers alone. Using post-its also means you and your team can physically interact with the map.
- Visually displaying the process makes it easy to spot areas that need improvements, for example loops or bottlenecks. This is one way to measure the efficiency of the process, for example, using TIMWOODs to assess how wasteful the process is.
- Making decisions about how to improve the process is faster when you can show the impact a change will have to the process, rather than just telling people.
- Making changes to a process that has been visually mapped out is less risky, given you have a detailed description of the process to guide the decision making process
- Training people for a new process is easier using your new process map which provides a visual illustration of all the steps they should follow.
Directions on how to use it?
Typically, process maps are created in a workshop setting enabling the map to be created drawing on the insight of the various stakeholders involved. You will need a large surface (e.g., wall, whiteboard, flipchart), post-it notes, and markers.
Step 1: Identify the problem and scope
If you are embarking on a process mapping exercise there is a reason for you doing so. What is the problem you are seeking to address? It is equally important to set the scope for the exercise. Where does the process begin and where does it end? Clearly defining the problem and scope and writing it down will make it easier for you to keep your team on track.
An easy way to ensure the scope is clear, is to have the team call out the first and last step of the process. Write each on an individual post-it note and place the start on the left (or top) and the end on the right (or bottom) of the surface you are working on. Ask the team if they agree - when they do, you are ready to move on.
Step 2: List the steps
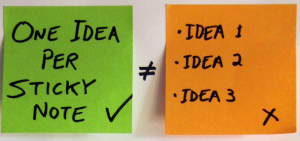
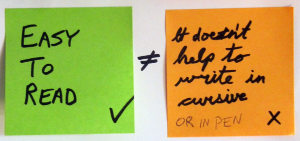
Write each individual step on a single post-it note. Use a marker and write in ALL CAPS. This will make the process map easy to read for the people in the room as well as anyone who may want to look at a photographed version of the map.
Step 3: Put the steps in order
Now that you have captured all the steps, start arranging them on a wall (or whiteboard) in the correct order. Remember, this is how the process currently works (AS-IS) rather than how you think it should.
Step 4: Add in decision points and draw in arrows
If there are parts to your process that branch off in different directions depending on the context or a decision being made (most often there is!), add in your decision points so the different paths through the process can be made clear.
Once you are happy with the layout of your process map, add in the arrows and any necessary labels (e.g. “yes/no” on decisions). The arrows show the direction in which the process flows. There is only one arrow out of a process step and two arrows out of decision points.
Step 5: Review for completeness and accuracy
Review the end-to-end process. Is this an accurate reflection of how the process currently works? If not, make any amendments necessary to provide a true reflection of the AS-IS process.
Step 6: Highlight area(s) where problem(s) currently occur
With the AS-IS process mapped out in front of you, highlight the key areas of focus based on your original problem statement. You should also reflect on the process using TIMWOODS (as described in an earlier post) to identify any waste that may be occurring.
What next?
Now that you and your team have a shared understanding of how the process is currently working and where problem areas may be you can start to investigate further. What further evidence can you provide for the problem that is occurring, the negative impact it is having, and why it may be occurring (e.g. customer feedback, existing reports)? Using this evidence in conjunction with brainstorming exercises, you will be able to get to the root cause of the problem – fix this and the problem will go away! Create a TO-BE process map so you can experiment with the changes you will make to improve the process.
Contact (opens in a new window)agile@ucd.ie for support on using tools such as this and others.
Published on 07 April 2020